Managing Accounts
Managing AWS Accounts
SkySaver can monitor and manage resources across multiple AWS accounts. This section covers how to add, configure, and manage AWS accounts in your project.
Prerequisites
Before adding an AWS account:
- Deploy IAM Role - Complete the AWS Account Setup to deploy the required IAM role
- Note Account ID - Have your 12-digit AWS account ID ready
- Verify Permissions - Ensure the CloudFormation template was deployed successfully
Tip: For first-time users, we suggest deploying the IAM role before adding accounts. This reduces configuration steps.
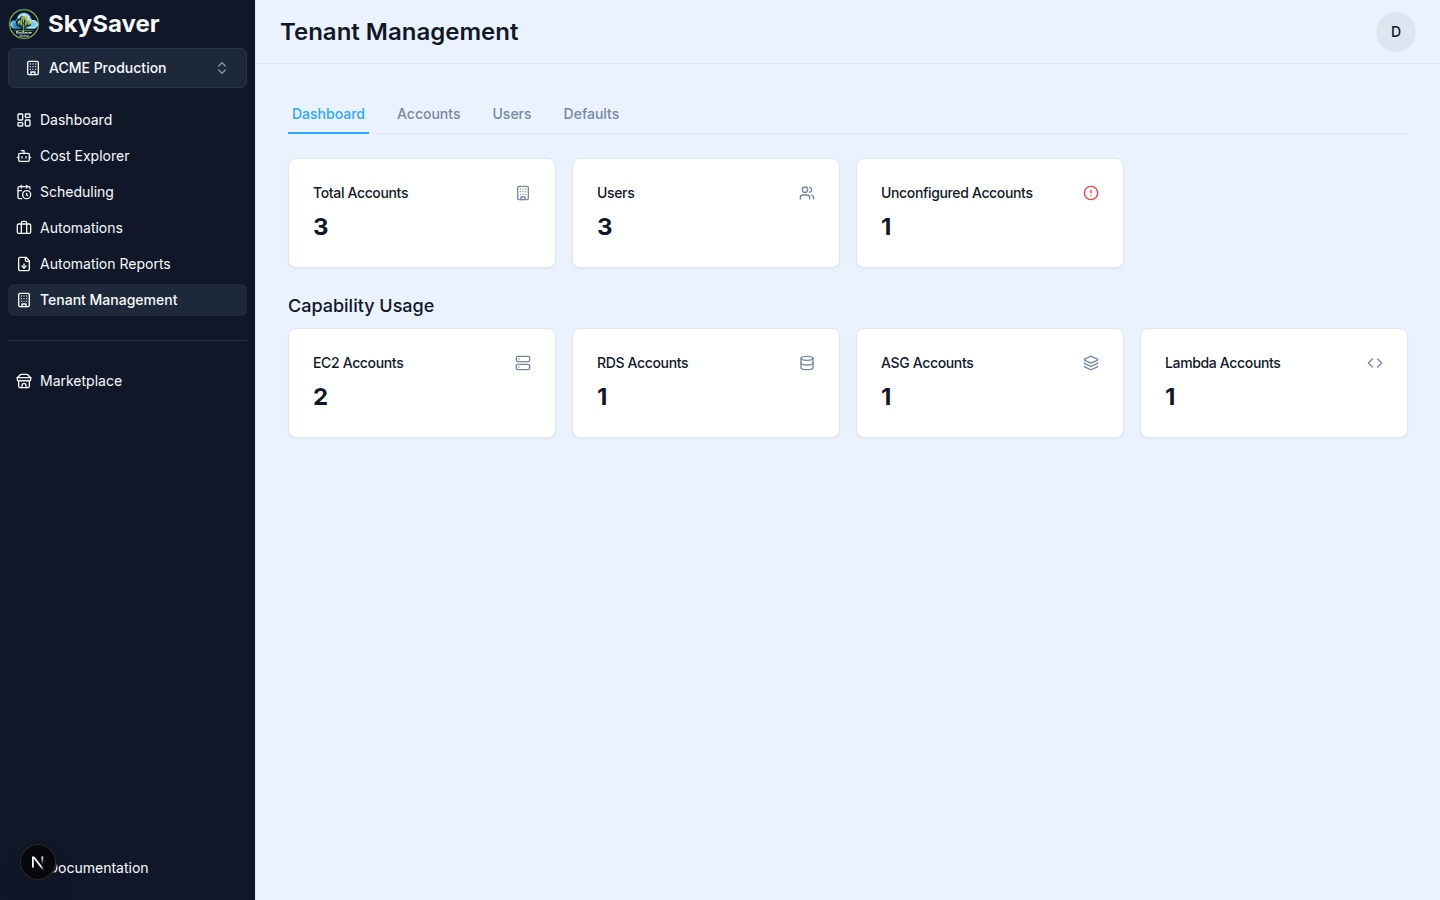
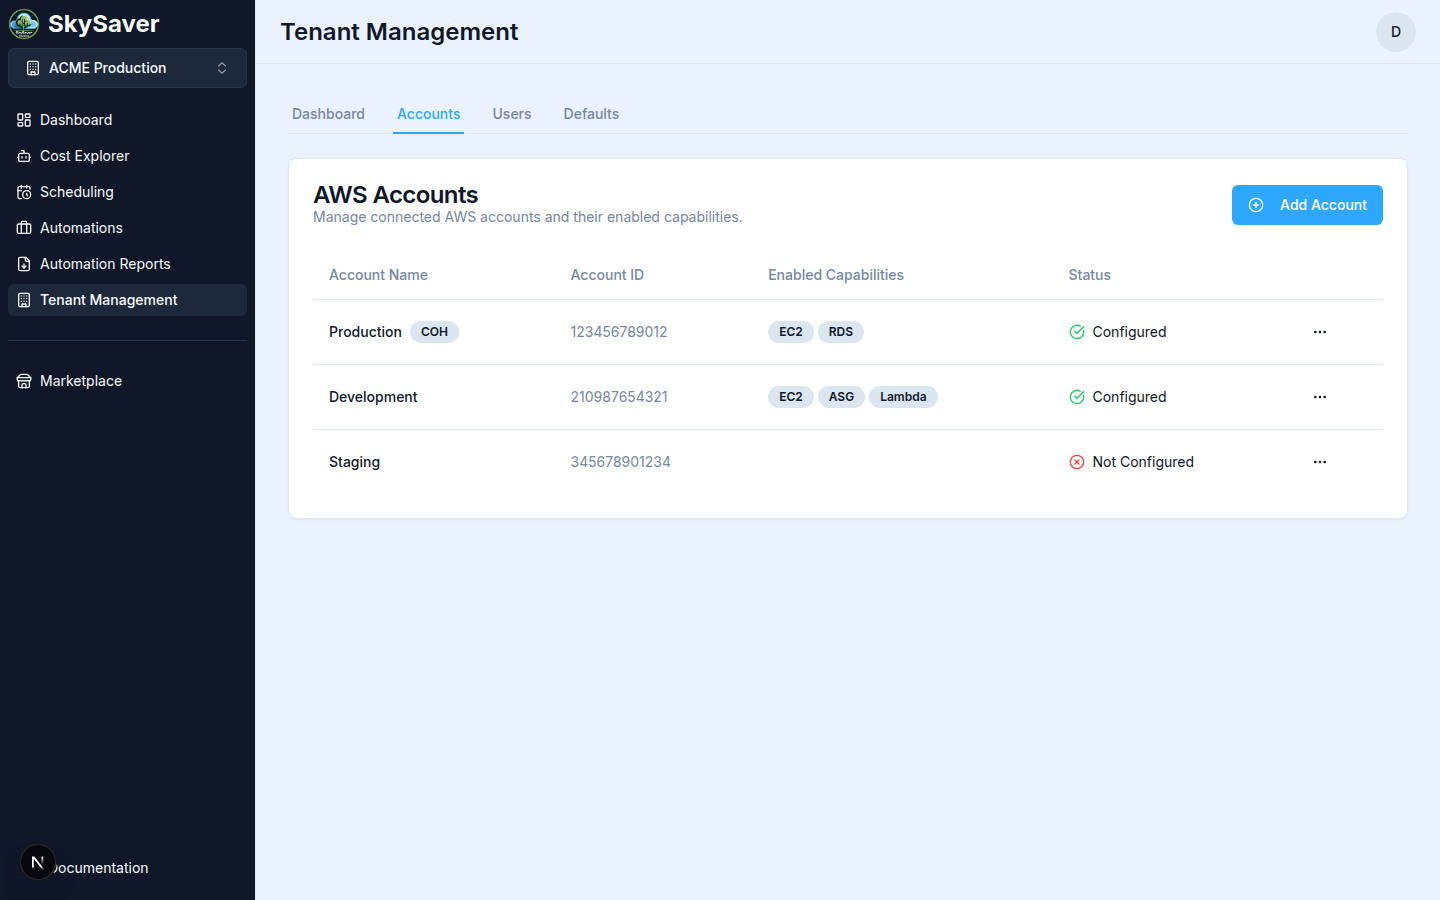
Viewing Accounts
Navigate to Tenant Management and click the Accounts tab to see all connected AWS accounts.
| Column | Description |
|---|---|
| Account Name | Friendly name for the account |
| Account ID | 12-digit AWS account number |
| Enabled Capabilities | Resource types enabled for this account (EC2, RDS, ASG, Lambda) |
| Status | Configuration status (Configured/Not Configured) |
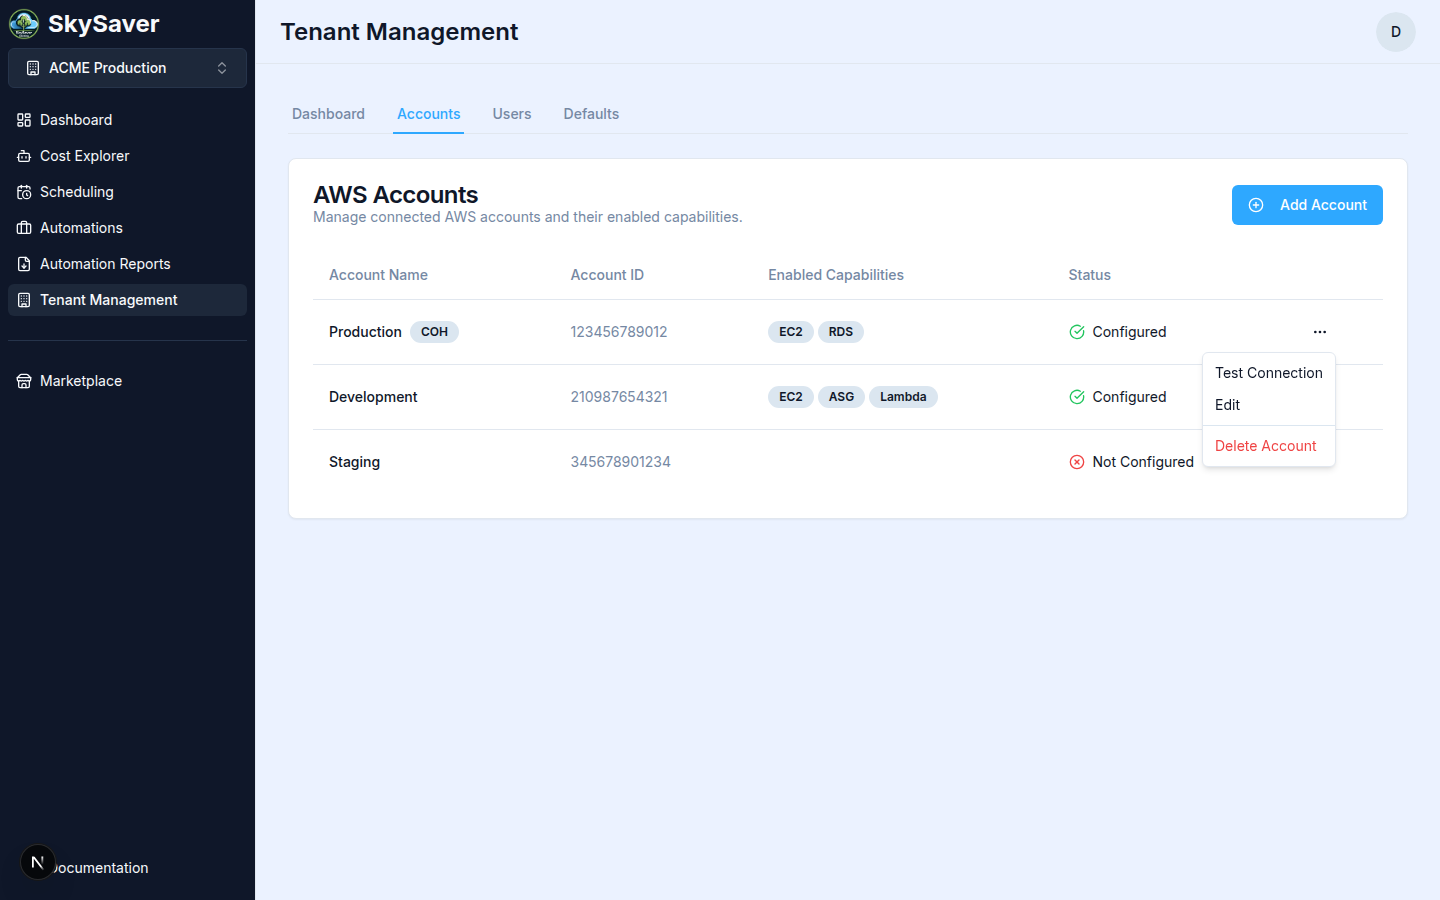
| Actions | ⋯ menu with Test Connection, Edit, Delete Account |
Adding Accounts
Step 1: Navigate to Tenant Management
Click on Tenant Management in the sidebar
Step 2: Select Accounts in Tenant Management
Click on the Accounts tab

Step 3: Click Add Account
Step 4: Enter Account ID
Enter your Account Name and 12-digit Account ID. You can also optionally override the default values for a new account.
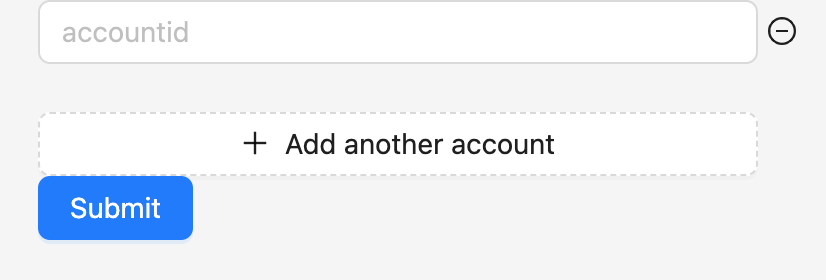
Step 5: Submit
Click Add Account
Account Status
After adding an account, check its status:
| Status | Meaning | Action |
|---|---|---|
| Configured | IAM role is accessible | Ready to use |
| Not Configured | IAM role not found | Deploy CloudFormation template |
| Error | Permission issue | Check IAM role configuration |
Checking Account Status
- Navigate to Tenant Management > Accounts tab
- Click the ⋯ menu on the account row and select Test Connection
- SkySaver attempts to assume the IAM role
- Status updates based on result

Account Configuration
Each account can have custom settings:
Tag Configuration
Override the project default tag for specific accounts:
- Click the ⋯ menu on the account row and select Edit
- Update the Automation Tag Key field
- Click Save Changes
This allows different accounts to use different schedule tag keys.
Regional Settings
Accounts inherit project default regions, but can be customized:
- Click the ⋯ menu on the account row and select Edit
- Add or remove Regions
- Click Save Changes
Multi-Account Setup
SkySaver supports managing many AWS accounts:
graph TB
    A[SkySaver Project] --> B[Production Account]
    A --> C[Staging Account]
    A --> D[Development Account]
    A --> E[Shared Services Account]
Best Practices
- Organize by purpose - Use projects to group related accounts
- Consistent tagging - Use the same tag key across accounts when possible
- Least privilege - Only grant necessary permissions
- Regular audits - Periodically verify account configurations
AWS Marketplace Integration
If you subscribed via AWS Marketplace:
- The subscribing AWS account is automatically added
- You still need to deploy the IAM role
- Additional accounts can be added manually
Removing Accounts
To remove an AWS account:
- Navigate to Tenant Management
- Click Accounts in Tenant Management
- Click the drop down for your account and select Delete Account
- Confirm Deletion
Warning: Removing an account stops all SkySaver management of resources in that account. Schedules will no longer execute.
Troubleshooting
| Issue | Cause | Solution |
|---|---|---|
| Account stays unconfigured | IAM role not deployed | Deploy CloudFormation template |
| Permission denied | External ID mismatch | Verify External ID in role |
| Resources not found | Wrong tag configured | Verify tag key matches |
Related Topics
- AWS Account Setup - Deploy the IAM role
- Project Defaults - Project-level settings
- Key Concepts - Understanding accounts and projects