How-To Create Tags
If you are unfamiliar with creating tags for your AWS resources then please follow below on where to create tags within the AWS portal for the following resoureces: EC2, RDS, LAMBDA, ASG. If for some reason you cannot create tags, you will need to reach out to your AWS administrator and look into either having them create tags for you, or allowing you to have creade and modify tag priviledges in your AWS role. We will also only walk through the AWS portal options, if you prefer code then please review the AWS article here: https://docs.aws.amazon.com/AWSEC2/latest/UserGuide/Using_Tags.html
EC2
Navigate to your EC2 Menu in the AWS Portal, select your Instance, Select Actions -> Instance Settings -> Manage Tags
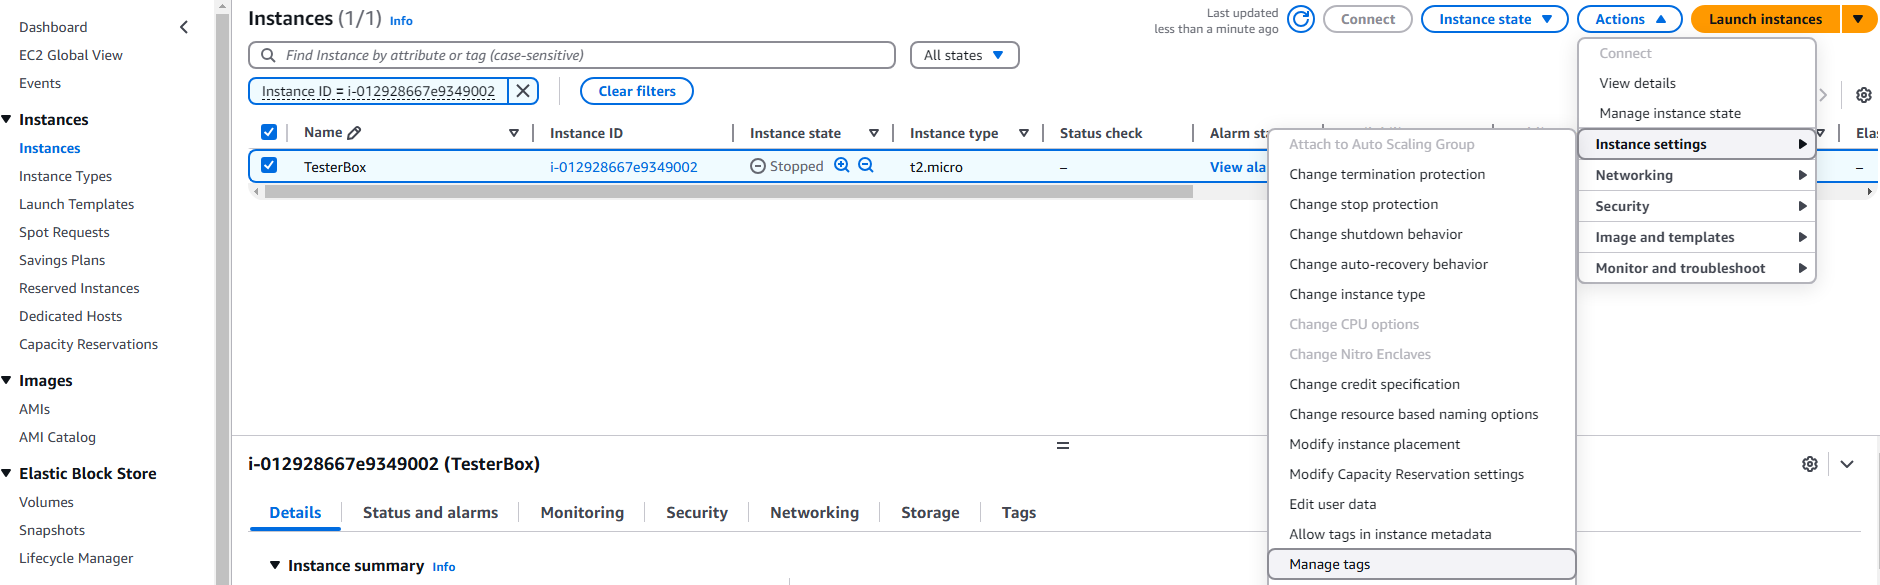
Then click on Add New Tag, under Key add your SkySaver tag associated with the AWS account, in this example we are using SkySaverSchedule, and under Value add your SkySaver Schedule Name, in this example we are using ec2-demo-schedule. Then hit save and you are done, you’ve added a SkySaver schedule to your resource!

Lambda
Navigate to your Lambda Menu in the AWS Portal, select your Function, Navigate to Configuration -> Tags -> Manage Tags
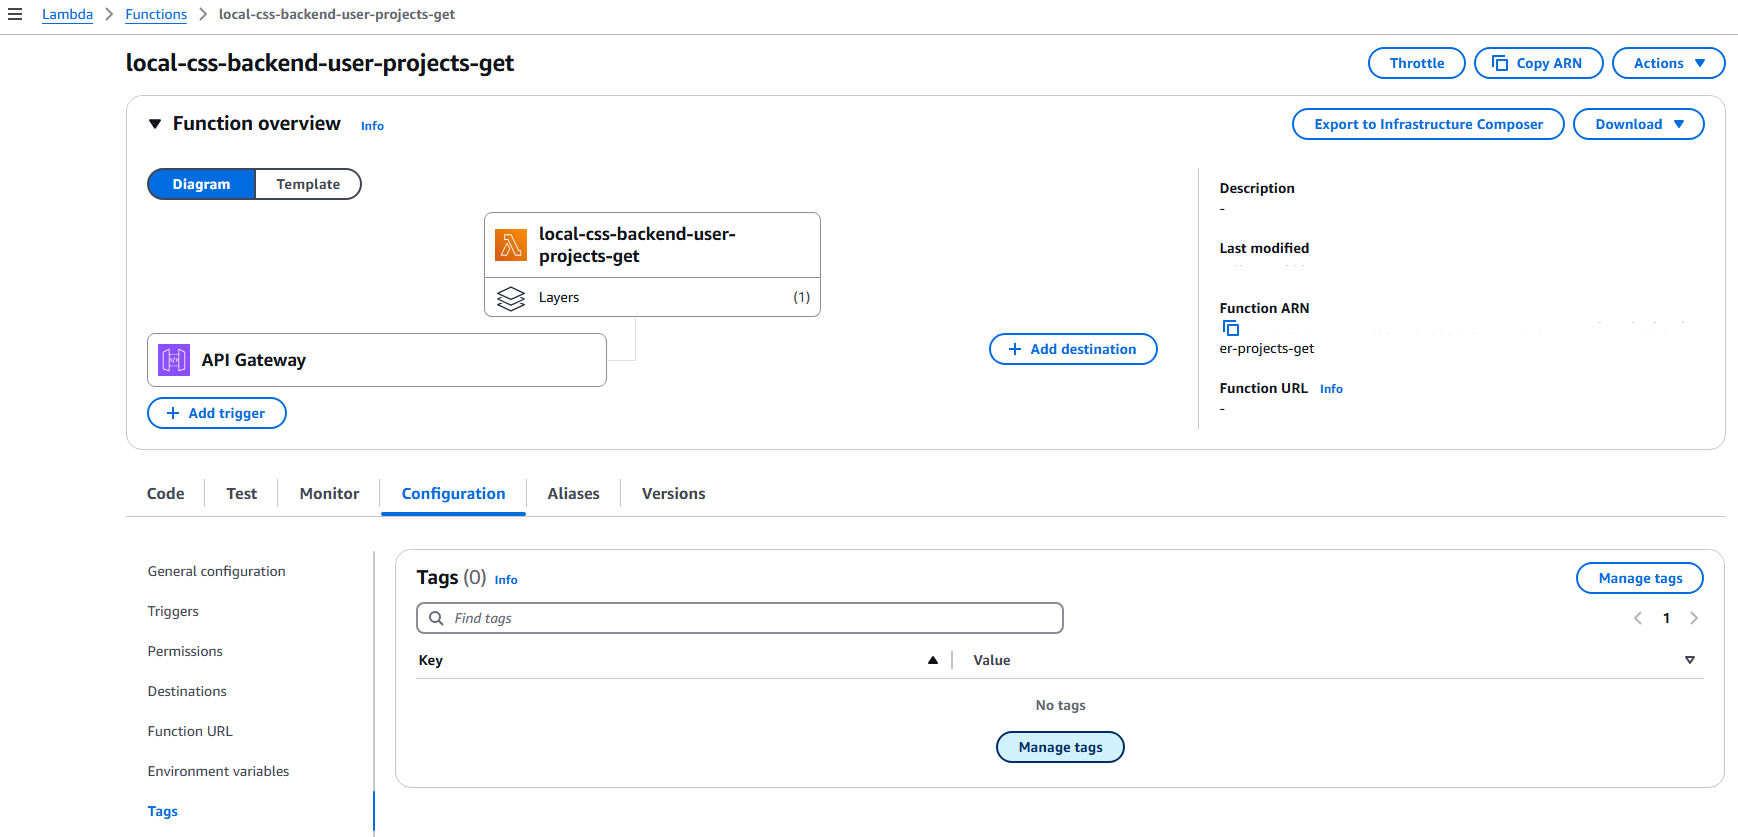
Then click on Add New Tag, under Key add your SkySaver tag associated with the AWS account, in this example we are using SkySaverSchedule, and under Value add your SkySaver Schedule Name, in this example we are using lambda-demo-schedule. Then hit save and you are done, you’ve added a SkySaver schedule to your Lambda resource!

RDS
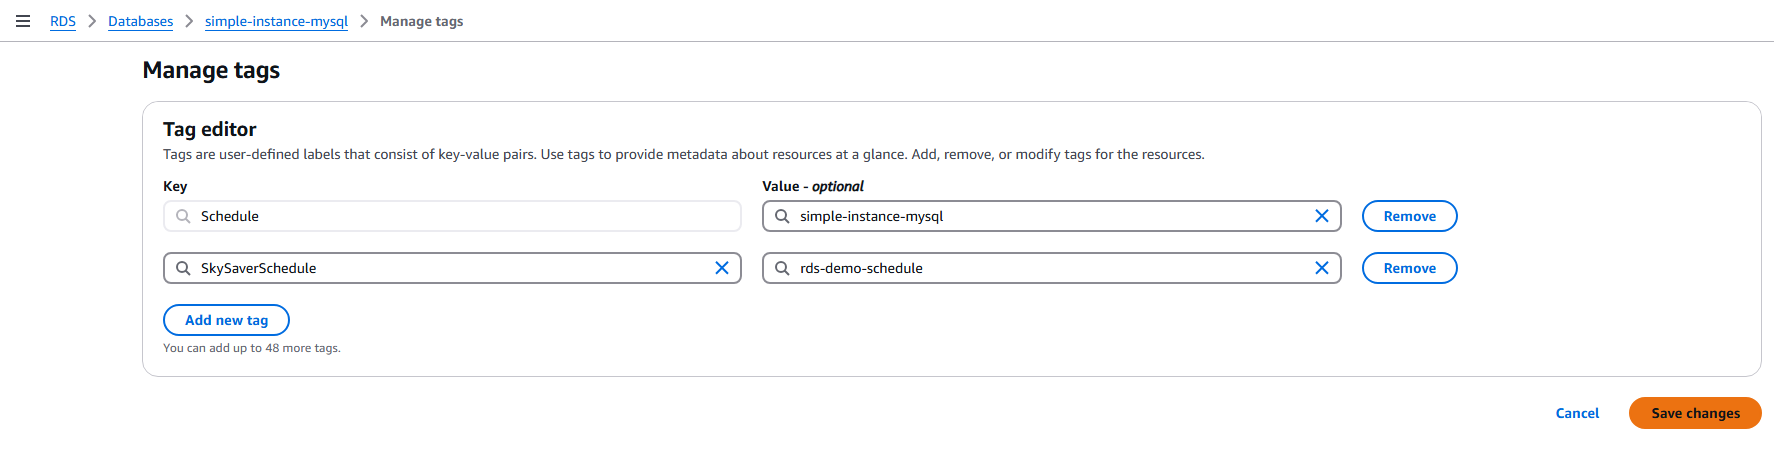
Navigate to your RDS Menu in the AWS Portal, click on the DB identifier for your database you would like to tag, Navigate to Tags -> Manage tags.
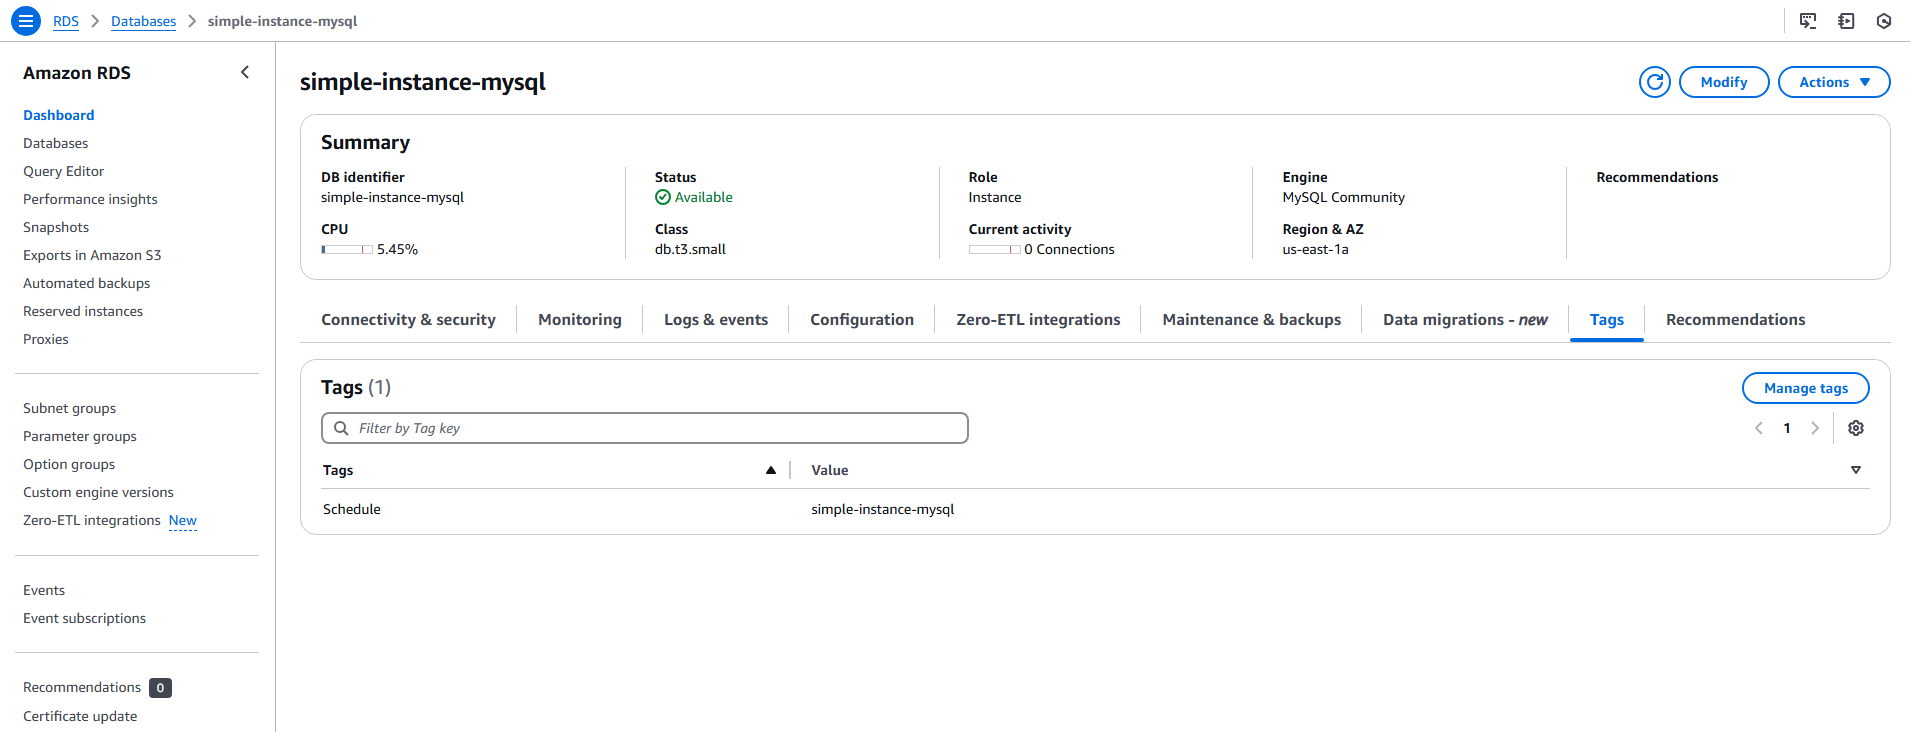
Once here you can click Add new tag, under Key add your SkySaver tag associated with the AWS account, in this example we are using SkySaverSchedule, and under Value add your SkySaver Schedule Name, in this example we are using rds-demo-schedule. Then hit save and you are done, you’ve added a SkySaver schedule to your RDS resource!
ASG
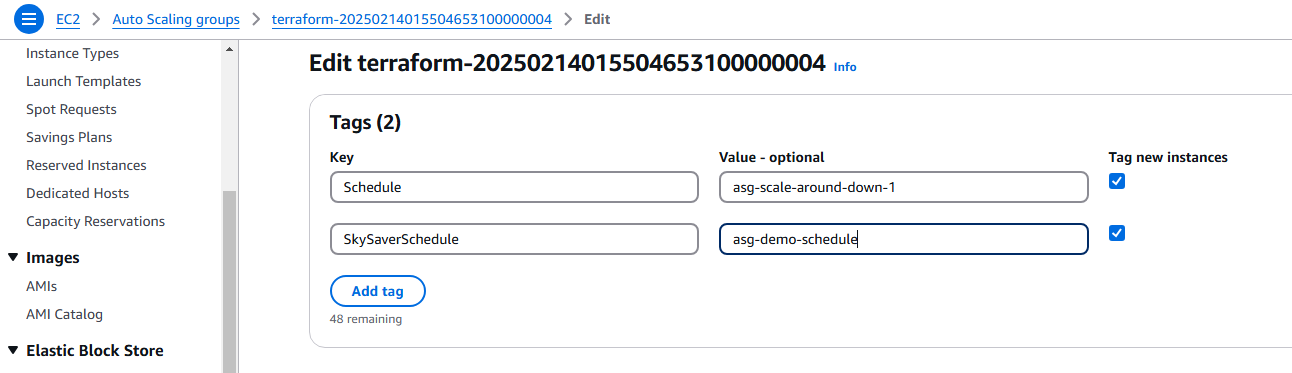
Navigate to your EC2 Menu in the AWS Portal, scroll down on the left side panel to navigate to Auto Scaling Groups, once here click on the name of the ASG that you would like to tag.
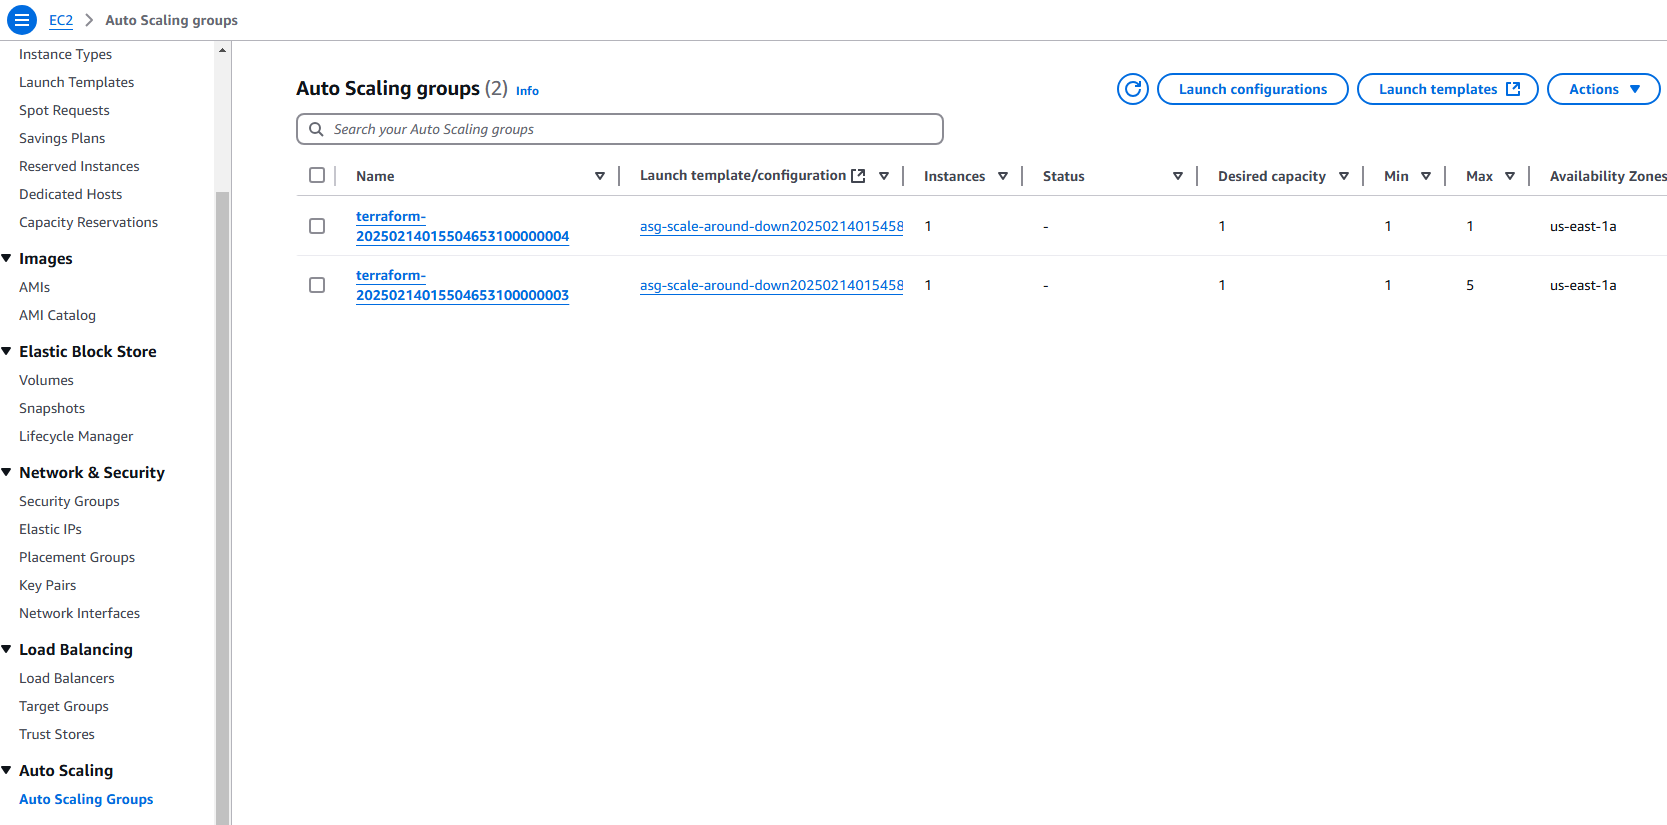
Once you have clicked on the ASG you would like to tag, scroll down in the Details panel, the tags menu is at the bottom. click edit tags. Add new tag, under Key add your SkySaver tag associated with the AWS account, in this example we are using SkySaverSchedule, and under Value add your SkySaver Schedule Name, in this example we are using asg-demo-schedule. Ensure that you have Tag new instances activated. Then hit update and you are done, you’ve added a SkySaver schedule to your RDS resource!