Resource Scheduling
Resource Scheduling
Resource Scheduling is SkySaver’s core feature for automating AWS resource management. Create schedules to automatically start, stop, and scale resources based on time patterns.
Overview
Schedules define:
- What resource types to manage (EC2, RDS, Lambda, ASG)
- When resources should be active or inactive (periods)
- How resources should be configured during each state
Supported Resources
| Resource | Actions | Use Cases |
|---|---|---|
| EC2 | Start/Stop, Instance Type | Dev environments, batch processing |
| RDS | Start/Stop, Instance Class | Non-production databases |
| Lambda | Concurrency scaling | Cost control, burst management |
| ASG | Capacity scaling | Variable workloads |
How Scheduling Works
graph LR
    A[Create Schedule] --> B[Add Periods]
    B --> C[Tag Resources]
    C --> D[Scheduler Runs]
D --> E[Resources Managed]- Create a schedule - Define name, type, and timezone
- Add periods - Specify when resources should be active
- Tag resources - Apply schedule tag to AWS resources
- Scheduler runs - SkySaver continuously monitors and acts
- Resources managed - Resources start/stop per schedule
Active vs Inactive
| State | Timing | Resource Behavior |
|---|---|---|
| Active | Within a period | Running, scaled up |
| Inactive | Outside all periods | Stopped, scaled down |
Example: Business Hours Schedule
A schedule for development EC2 instances running Monday-Friday, 9 AM - 6 PM:
Schedule: dev-business-hours
Type: EC2
Timezone: UTC-5 (Eastern Time)

Period 1:
  Start: 09:00
  End: 18:00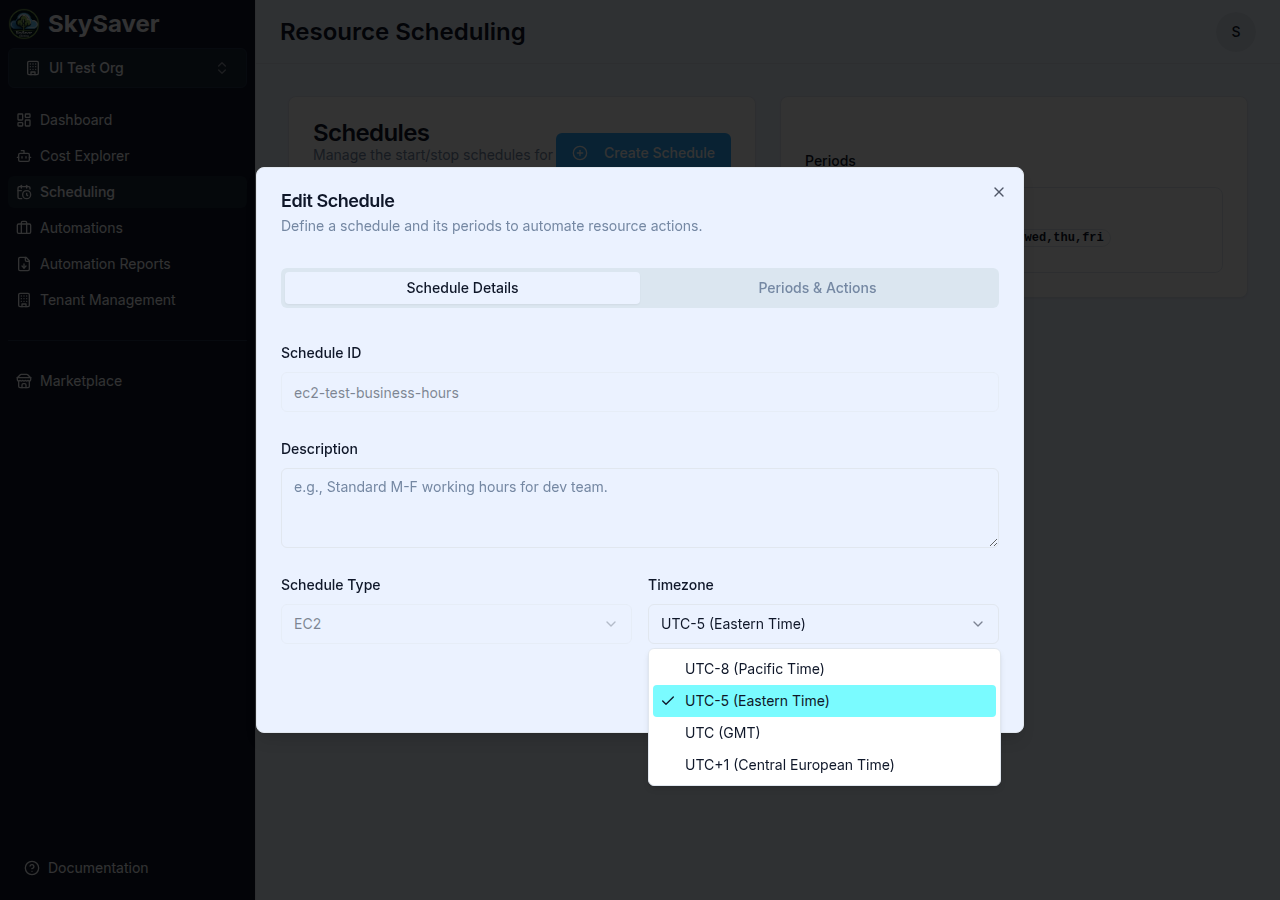
Days: Mon, Tue, Wed, Thu, FriNote: Timezones in the SkySaver UI are displayed as UTC-offset labels with a region label (e.g.,
UTC-5 (Eastern Time)) rather than IANA timezone names (e.g.,America/New_York). Available options include UTC-8 (Pacific Time), UTC-5 (Eastern Time), UTC (GMT), and UTC+1 (Central European Time).
Result: Instances start at 9 AM, stop at 6 PM on weekdays.
In This Section
| Page | Description |
|---|---|
| Creating Schedules | Step-by-step schedule creation |
| Schedule Types | Resource-specific configuration |
| Periods | Configuring time windows |
| Managing Schedules | Edit, delete, and monitor |
| Examples | Common scheduling patterns |
| Tagging Resources | How to tag AWS resources |
Quick Start
- Navigate to Scheduling and click Create Schedule
- Enter a schedule ID (e.g.,
dev-business-hours) - Select resource type (e.g., EC2)
- Choose timezone
- Add a period with start/end times
- Save the schedule
- Tag your AWS resources with the schedule ID
Prerequisites
Before creating schedules:
- Enable Resource Scheduler automation - Navigate to Automations and enable the Resource Scheduler. The Scheduling navigation item is only visible after this automation is enabled.
- Connect AWS accounts - Add accounts to your project
- Enable services - Toggle services in Project Defaults
- Deploy IAM role - Complete AWS Account Setup
Best Practices
- Use descriptive names - Include resource type and timing (e.g.,
ec2-dev-business-hours) - Consider timezones - Use consistent timezones across schedules
- Start conservatively - Test with non-critical resources first
- Document schedules - Maintain a schedule inventory
- Review regularly - Audit schedules as needs change
Related Topics
- Resource Scheduler Automation - How the scheduler works
- Key Concepts - Understanding schedules and periods
- Quick Start Guide - First schedule walkthrough